You can easily add multiple blogs to your Shopify store using the e-commerce platform’s native blog or DropInBlog, an SEO-friendly Shopify blogging app. So, in this guide, we’ll show you the steps for adding a second or third blog to Shopify using these two approaches.
But first, let us give you a few scenarios in which it makes sense to run multiple Shopify blogs:
You have two or more different blog topics and want to separate them.
You have different products or services you want to promote.
You offer services in different locations and want to target different geographic audiences.
You run a multilingual blog.
In all of these scenarios, it’s important to have a bullet-proof content marketing strategy for your store if you want to increase traffic to your site and drive potential leads.
The “how-to” part of adding another blog to Shopify comes down to two methods: using multiple blog categories within your Shopify account and creating separate blogs with the DropInBlog Shopify app.
So, let’s take a closer look at how these two methods work.
Table of Contents
- Creating Multiple Blogs with the Shopify Native Blog
- Adding Multiple Blogs to Shopify with DropInBlog
- DropInBlog’s Advantages over Shopify’s Native Blog
- Tips and SEO Considerations for Managing Multiple Shopify Blogs
- FAQs
- Create Multiple Blogs on Shopify the Easy Way
Creating Multiple Blogs with the Shopify Native Blog
If you’ve already created your first blog in Shopify, then adding the second blog is quite simple.
Step 1: Create a New Blog in Shopify
1. From within your Shopify account, select the Content tab from the left sidebar, then Blog Posts, and click on the Manage Blogs button.
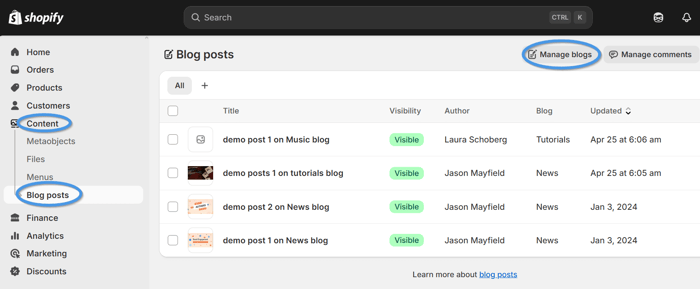
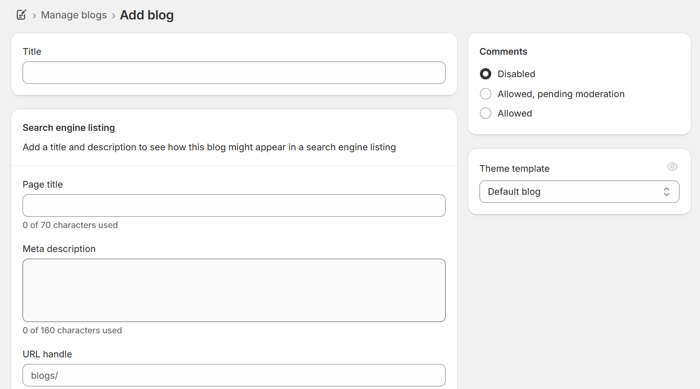
2. On the following screen, click on the Add Blog button, and you’ll be presented with another page where you can add your new blog’s name, SEO title and meta description, turn blog comments on or off, and customize your blog URL.
Step 2: Name Your New Shopify Blog
When naming your second Shopify blog, you might need to rename the original blog to keep the two blogs distinct from each other. However, you’ll have very little ability to edit the URL structure within Shopify. You can’t remove the “blogs” part of the URL structure, and this can become convoluted.
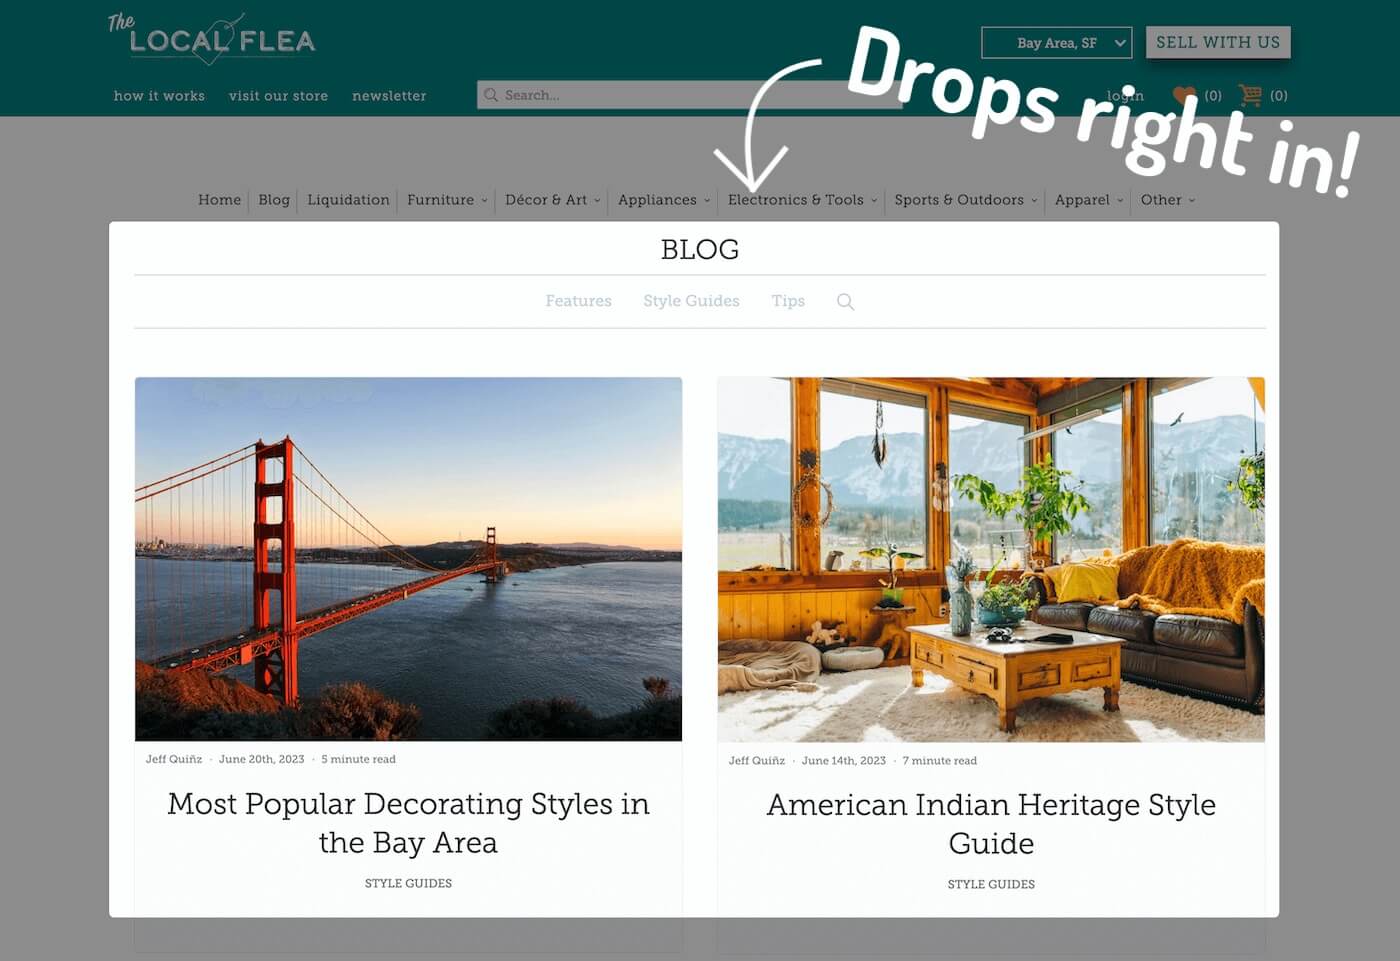
For example, if you have a store selling hiking products in different locations, you might have the following URL structure:
domain.com/blogs/hikingutah
domain.com/blogs/hikingmontana
Step 3: Set Up URL Redirects in Shopify
The other thing to keep in mind is URL redirects. If you’ve changed your URL structure in any way, you need to ensure all links remain connected. If you do not set up redirects, existing links will be broken, which is very damaging for SEO.
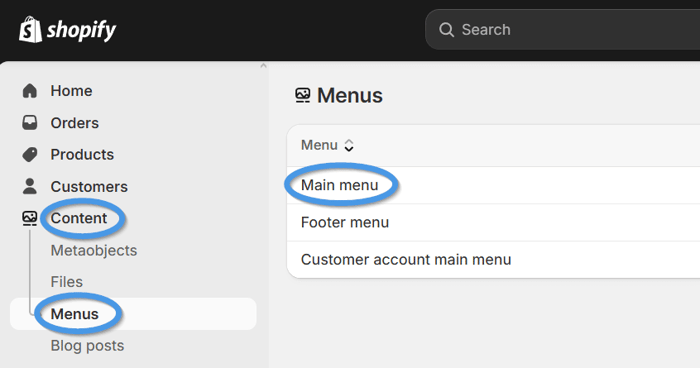
So, to avoid having broken links on your blog, click on Menus under the Content section in your store’s navigation menu. On the right side of the screen, you’ll see URL redirects.

Selecting this option will open a new page, where you can create a new redirect by adding your original blog URL and a new one.
Step 4: Add a Blog Link to Your Shopify Store Menu
Once you have named your new blog and set up the URL redirects, don’t forget to include it in your navigation header. To do that, open Menus from Shopify’s Content tab, and select the menu where you want to add your new blog’s URL.
After that, you’re done!
It’s certainly not difficult to set up a second or even third blog on your Shopify store, but with a confusing blog URL structure and blogging limitations of the native Shopify blogging tool, you might want to consider the second method of adding multiple blogs to Shopify – DropInBlog.
Adding Multiple Blogs to Shopify with DropInBlog
To add a second blog to your Shopify store with DropInBlog, follow the six simple steps below.
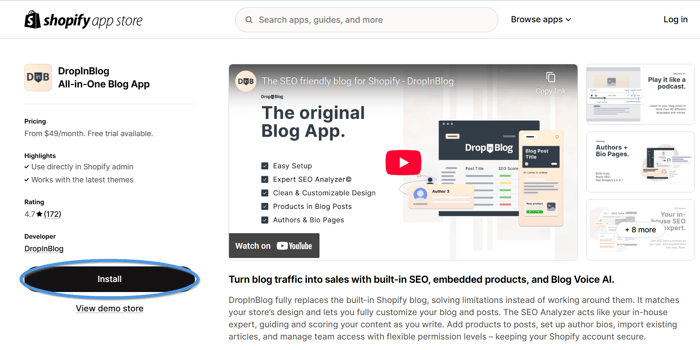
1. Find the app in the Shopify App Store and click on the Install button.
2. Grant the DropInBlog app the necessary permissions, and on the next screen, select your pricing plan to activate your free trial.
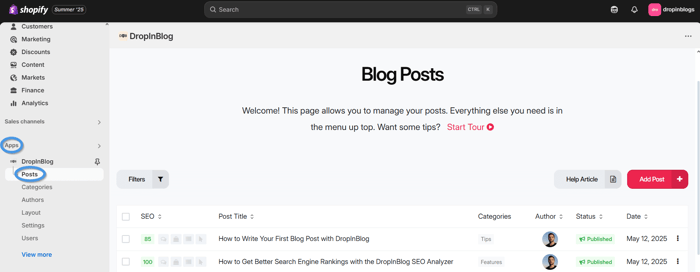
3. Once installed, open DropInBlog from the Apps section in your Shopify account, and click on the Posts tab.
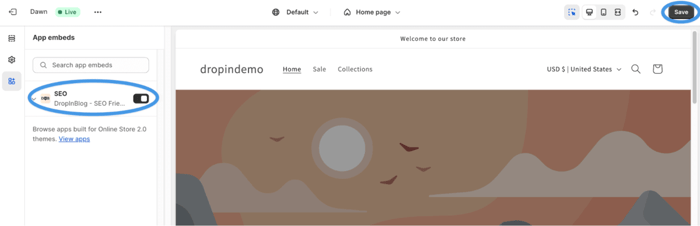
4. Here, you’ll see the “Activating the DropInBlog extension” link. Click on it, and on the following page, toggle the switch on the left and save your changes.
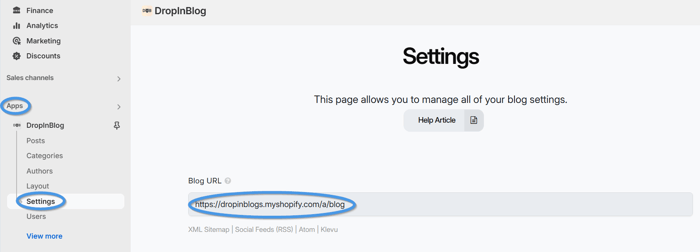
5. Next, open your blog’s settings page by going to Apps → DropInBlog → Settings. In the Blog URL field, you’ll find your new blog link. Copy the link, and move on to the final step.
6. Click on the Content tab, then select Menus, and click on your store’s menu where you want the link to your second Shopify blog to appear. Click on Add menu item, then add the name of your blog under Label, and paste the blog URL you previously copied under Link.
Upon saving the changes you made, paste your blog’s URL in the address bar to view your new blog.
DropInBlog’s Advantages over Shopify’s Native Blog
DropInBlog gives you all the benefits of a professional blogging app and has a built-in SEO Analyzer to optimize all your content perfectly every time.
You can also insert all your Shopify products directly into blog posts, which puts it head and shoulders above the native Shopify blog. Customers don’t have to go hunting around on your site for the products they find in your blog posts.
Moreover, your blog will visually reflect the rest of your Shopify store because DropInBlog automatically inherits your site's CSS and style. This is a huge bonus because with most third-party blogging apps, you need to reformat blog posts to match your site.
Another important factor to note with DropInBlog is that you can edit Shopify’s blog URL structure, and that won’t hurt SEO. Because DropInBlog slides into place within your store and doesn’t live on a separate domain, there’s no complication with URL structure. This means your store – which is where you want to drive traffic via your blog – gets all the SEO gains.
Last but not least, DropInBlog comes with a Recent Posts widget, which you can use to display posts from different blogs across your website.
Feature | Shopify Native Blog | DropInBlog |
Add multiple blogs | ✅ Yes | ✅ Yes |
URL control | ❌ No | ✅ Yes |
Built-in SEO tools | ❌ Limited | ✅ Yes, SEO Analyzer |
Embed products | ❌ No | ✅ Yes |
Custom styling | ❌ Limited | ✅ Inherits Shopify CSS |
Tips and SEO Considerations for Managing Multiple Shopify Blogs
To get the most out of running multiple blogs on Shopify, follow the tips below:
Choose a short, descriptive blog name. When applicable, use topic hints such as “tutorials,” “tips,” or “news.”
If you change the original blog name, don’t forget to create a 301 redirect.
Create a content plan for your blogs with unique content pillars.
Publish and update your blog content regularly, while prioritizing your publishing pace based on the nature of your blogs (e.g., a product blog won’t be updated as frequently as a support blog).
Regularly audit your blogs to avoid duplicate content. If you’re discussing similar topics on your blogs, consider creating an in-depth piece for that topic on a single blog and linking to it from another blog.
Use internal links between your blogs to increase your visitors’ time on site and your blogs’ visibility in search engines. Link to relevant content only.
Track your blogs’ performance separately to easily pinpoint each blog’s content gaps, working strategies, and overall performance. You can use tools like Google Analytics for that.
FAQs
Create Multiple Blogs on Shopify the Easy Way
While it’s quite easy to add multiple blogs to your Shopify store from within the Shopify account, you may not want to use Shopify for blogging in the first place.
We presented DropInBlog as a viable alternative. Luckily, it’s just as easy to add one or more blogs to your Shopify store with DropInBlog, and you’ll get countless benefits with this platform.
DropInBlog has multiple pricing plan options and a super helpful customer support team. Get in touch if you have any further questions.